
I’ve long been a tinkerer of home automation:
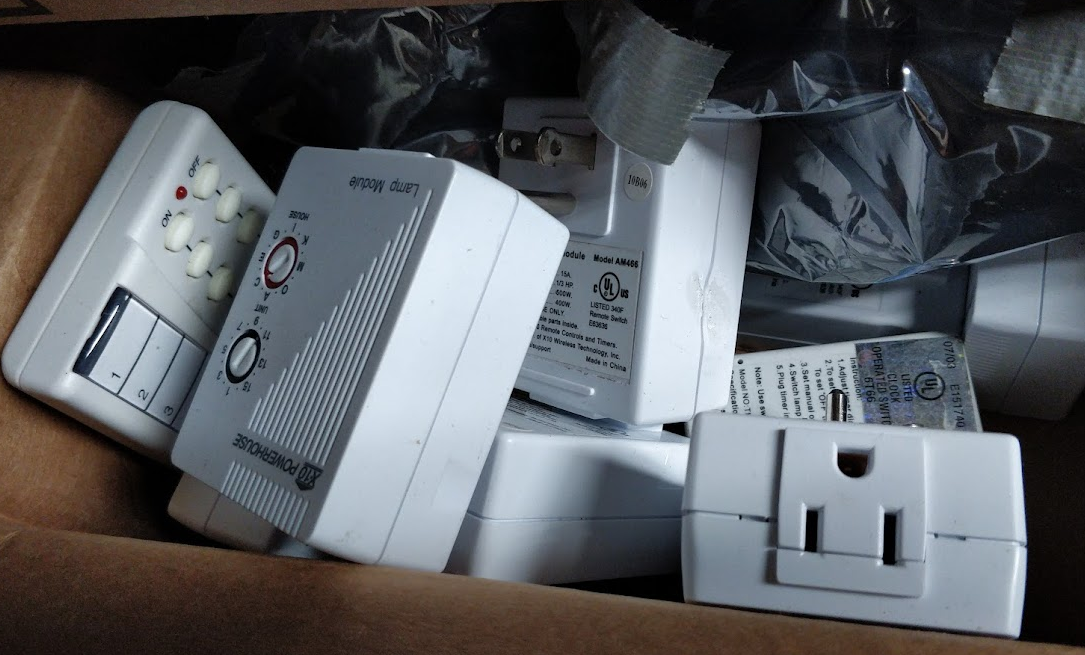
notice how they are all in a box, now obsoleted.
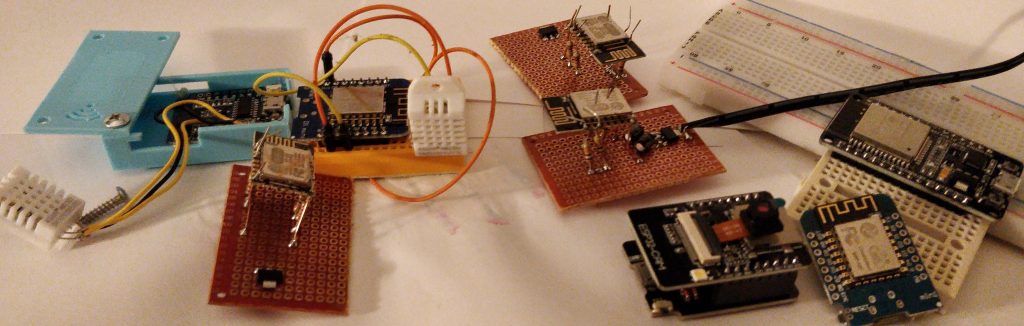
Since moving to the US in 2019 and buying my first home, my old X10 modules came out of storage. I quickly realized that a whole world of development has happened in home automation since I used these. I had experience with various environmental sensors, but I wanted lots of them, and cheaply. I ran across the ESP8266 boards and became fascinated by how much you can do for how small a cost. I bought several and even tinkered with building some using the bare ESP8266 chips which cost just $1 each:
I’m quite comfortable with Prometheus, so I wrote some exporters from scratch and found others writing them too. I used a Grafana dashboard to keep an eye on the sensors. I later dove deep into Home Assistant and found myself pushing sensor data from Prometheus into Home Assistant. Throughout all of this, I kept running across the ESPHome project over the course of 2020 and 2021, but it just didn’t click. What is it again? Is it part of Home Assistant? It just didn’t make sense to me. So here goes…an introduction to ESPHome!
What is ESPHome?
ESPHome is a distribution of software to flash on cheap Espressif ESP8266 and ESP32 chip devices to use them with Home Assistant.
What again?
Let’s say you have some ESP hardware and something you want to do with it, for example you want to read a DHT22 temperature/humidity sensor. You already use Home Assistant, and you want to make your sensor readings available in Home Assistant using your ESP device. ESPHome makes that as easy as it can be:
- Wire up the DHT22 to your ESP board
- Start the ESPHome dashboard
- Create a new device config and include the sensor configuration
- Upload your first firmware via USB serial to the ESP device
- Add the device to the Home Assistant ESPHome integration by it’s IP or mDNS name.
- Voila – your DHT22 readings are now in Home Assistant!
Why ESPHome?
One of the reasons to love Home Assistant is that it’s yours: you can run it on your own hardware and your data remains your own. You can use it even if your home internet is down – no cloud required. No subscriptions.
ESPHome is much the same: you can make little IoT-like devices, cheaply, and not have someone’s cloud service stuck in the middle. Home Assistant controls the devices directly on your home network. No cloud. Open source software. Your data is yours.
Is it part of Home Assistant?
ESPHome is technically separate from Home Assistant, however it is basically written for Home Assistant. It’s separate enough that has been used with OpenHAB, for example. The documentation in ESPHome does show screenshot snippets from Home Assistant. The company behind Home Assistant is maintaining ESPHome to boot.
If you don’t want to use Home Assistant, you can still use ESPHome – or you can consider other ESP firmware frameworks:
What kinds of things can you do with ESPHome?
You can read so many sensors ranging from air quality, temperature and humidity, light…if the device is simple and can be driven by GPIO pins on a ESP/Arduino/Pi board – including I2C and SPI bus applications, you can probably make it work with ESPHome. The documentation is extensive.
You can also use the ESP device to make things happen using relays, display outputs, and many more.
The list of supported devices is extensive, and every device has an example YAML snippet which you can try. Furthermore there are a lot of brand-name devices which have ESP chips in them, and a community of examples called ESPHome-Devices gives configurations for how to run them with ESPHome.
ESPHome also provides for “OTA” updates, meaning that after the first install of the software on your ESP device via USB-serial, subsequent configuration changes and software updates are done over WiFi. No wires.
Who is ESPHome for?
Probably two types of people:
- Entry level hackers who want to do some basic hardware hacking, like soldering things to GPIO pins on a device like an ESP8266 board and seeing them work in a nice UI in Home Assistant. You don’t need to write much code, really just some configuration in YAML.
- Experienced hackers (maybe like me) who have gone through piles of Raspberry Pi’s, Arduinos and Espressif devices and are just looking for a good way to manage a bunch of customize-able devices around my house without too much overhead writing and maintaining software.
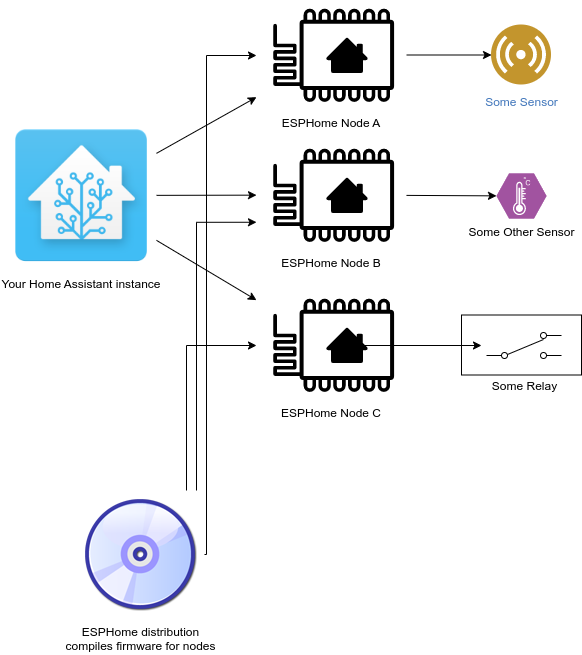
ESPHome Architecture
Before I used it, I was confused about the ESPHome architecture. Does it have a hub or controller? Do I need to run any centralized software separate from Home Assistant? Short answer: No! :)
Home Assistant talks directly to individual ESP nodes via their IP address (I recommend using mDNS for simplicity). No “hub” or “controller” node in the middle. Each individual ESP device hosts an API endpoint specific to Home Assistant. You run the ESPHome Dashboard and CLI tools to build firmware images at the time you want to make changes.
How to get started?
Find something you want to do with a little IoT device: read a sensor value, control a relay, something simple. You can even just program an ESP8266 chip to control it’s LED in Home Assistant, which is a great Hello World-esque example.
Make sure you’ve installed Home Assistant already.
Buy one or more ESP devices that come with a built-in USB-to-serial converter. If nothing else, you can find a pack of WeMos D1 Mini ESP8266 devices on Amazon for pretty cheap; however eBay is cheaper.
Install ESPHome. What this means can vary depending on how you want to use it; I run the ESPHome Dashboard in a Docker container on a laptop separate from where I run Home Assistant.
Plug in your ESP device. Run the dashboard. Create the device, which generates the basic device YAML:
esphome:
 name: yourdevice
 platform: ESP8266
 board: esp01_1m
logger:
api:
ota:
 password: "ee6d3cc677a5587c8e2a580b330e856f"
wifi:
 ssid: !secret wifi_ssid
 password: !secret wifi_password
Now add a switch configuration to control the on-board LED:
switch:
 - platform: gpio
   pin:
   # Your GPIO pin number for the LED varies by board.
   # on my WeMos D1 Mini boards it is GPIO2
     number: GPIO2
   name: "LED"
Compile, upload to the device.
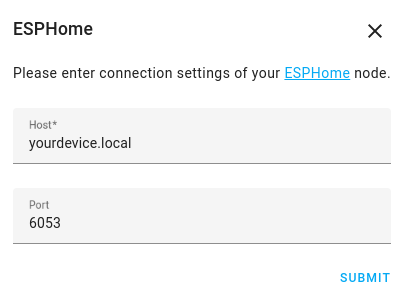
Now in Home Assistant, go to Integrations, find the ESPHome integration, and add the device by it’s mDNS name, yourdevice.local:
Once you hit submit, Home Assistant talks to the ESPHome node (your ESP device) and finds what controls and sensors it has, and they become available in Home Assistant like any other object. The LED switch we just specified will look like:
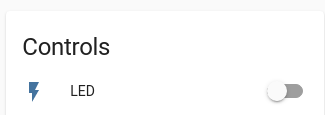
Flick the switch. If you see a light, you’re winning! If not, check your PIN number and board type and tinker until you get it.
Where to go from here?
Get tinkering!
- Go read about ESPHome at it’s home page, https://esphome.io/
- Buy some ESP8266 modules to start with, some sensors to play with, and maybe a relay for added fun.
- Install Home Assistant if you haven’t already.
- Get started with ESPHome (the Docker route works great)
- Have fun!